Seven Tips That Will Make Your Microphone Sound Better When Recording
Recording voice overs for your videos can be a surprisingly tricky task. At first glance, you might think that owning a decent microphone and speaking clearly into it is all it takes to have a voice over that sounds professional and builds trust and authority with your audience.
However, after a few takes, most people are disappointed by how different their audio sounds compared to their favorite YouTubers or podcast hosts. Your voice might be too quiet, too loud or end up drowned out by all the background noise you thought wouldn’t get picked up by the microphone.
Well, if you’re looking to improve the quality of your voice recordings, you don’t need to worry anymore! We’re here to give you some tips that will help you get better sound for your videos. Sure, nothing will ever make a 20$ headset sound like the 1000$ microphone your favorite YouTuber probably uses, but that doesn’t mean that your recordings can’t still sound professional.
It’s also worth noting that these tips will all work regardless of whether you’re using Flixier to record your voice or other programs like Audacity or Adobe Audition. For the most part, getting a high quality recording relies mostly on preparation, meaning most of the work gets done before you even press the Record button.
NOTE: If you do plan on using a professional program like Audacity or Adobe Audition to record, you can still use Flixier to sync the audio up with the rest of your video. Since it’s an online video editing program, Flixier lets you bring over audio files as well, so you can import voice overs that you recorded externally, or even add background music to videos!
So, without further ado, here are 7 tips that will help you get better voice recordings:
1. Turn off anything noisy in the room
Because of the way our brains work, most of us tend to automatically dismiss and ignore the background noises in our house. Microphones, however, tend to be very good at picking them up, especially condenser microphones such as the Blue Yeti, HyperX Quad Pro or the AT2020+ (which tend to be the favorites among budget-conscious content creators).
Background noise can be distracting for audiences, it can make what you’re saying difficult to understand and overall render your video difficult to listen to. That’s why it’s very important that you get rid of as many noise sources as possible. Close the windows to make sure no outside noises are leaking in, shut the door if there are other people living with you. Turn off any air conditioning or fans you might have running in your room.
Remember, your audience doesn’t care if you’re comfortable or not, but they do care about what you have to say, so it’s your mission to make it as easy as possible for them to understand you.
We’re going to discuss digital ways to remove background noise as well in a future article, but those usually tend to degrade voice quality and make you sound tinny and robotic, so if you want to offer your audience the best possible audio quality, it’s important to keep the noise level in the room as low as possible.
2. Keep the microphone OFF your desk, if possible
Another common issue with the most popular entry-level microphones like the ones we listed above is that they usually come with short, tripod-type stands that are meant to be placed on your desk.
While that may seem nice and practical at first, the issue here is that keeping the microphone so close to your keyboard and mouse means that every single key press or click will be picked up on the recording and overpower your speaking voice. This obviously won’t impact you if you’re making short videos where you don’t use the computer at all, but for anyone who does tutorials, playthroughs or live streams, keeping the keyboard sounds low enough is crucial.
Another issue with having your microphone on your desk is that even if your mouse or keyboard are mostly silent, every single bump you make on the surface of said desk (like lifting the mouse up and putting it down again while moving it, or placing down a cup of water) will get picked up by the microphone and sound like a loud thunder strike to your viewers.
Both of these issues can be easily fixed by placing your microphone on a boom arm instead of the default microphone stand. These usually clamp on to your desk or any other surrounding furniture and allow you to keep your mic suspended close to your mouth and off your desk, away from your mouse and keyboard.
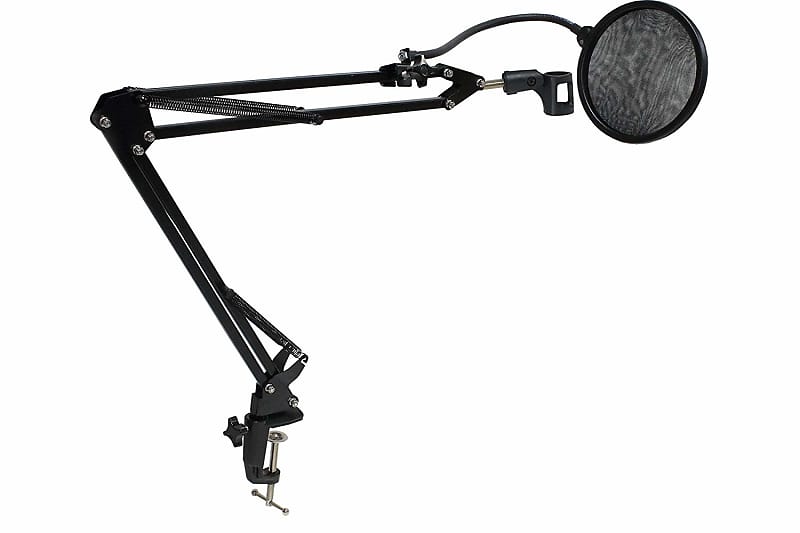
Boom arms may look a little intimidating if you’re not planning on turning your room into an improvised recording studio, but don’t worry. Cheap, spring operated boom arms can usually be found online for around $10 to $20. They will be good enough for your purposes and are a lot shorter than they look, taking up a lot less space than you might imagine.
3. Keep your microphone with its back turned towards any noise source
Even if you do your best to follow our first tip and turn off any unnecessary noise source, there might still be some noisy electronics in your recording room that you can’t turn off. Things like your computer or laptop, for example. Sure, if all you’re doing on it is record audio, you might get away with turning the fans down to minimum while you do so without your computer overheating, but if you’re making gaming videos then there’s no safe way to keep your computer from making noise.
There might, however, be a way to minimize the amount of noise that gets picked up on the recording. Most microphones these days have something that’s known as a “cardioid polar pattern”. That might sound fancy, but what it actually means is that your mic picks up sounds that come from its “front”, while ignoring those that come from behind.
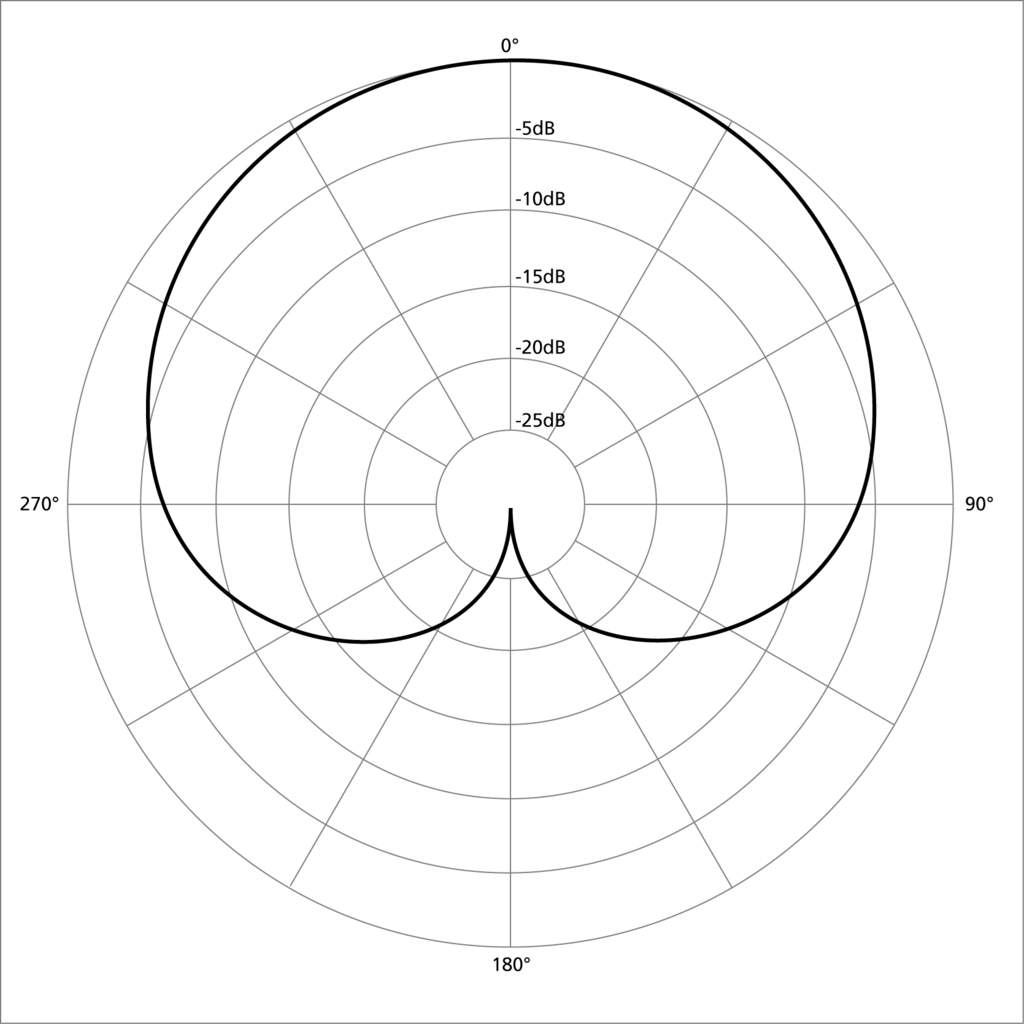
Most condenser microphones (like the AT2020) come with a cardioid polar pattern by default. If you happen to be using something like a Blue Yeti or HyperX Quadcast, make sure to select the cardioid polar pattern using the physical slider on the mic itself.
After you’ve enabled the right polar pattern, try placing your microphone so that the source of the noise (your computer, for example) is directly behind it, while you’re in the front. This probably won’t eliminate the background noise completely, but it will decrease its volume in the final recording considerably, making it a lot easier for your audience to focus on what you’re saying.
4. Keep your microphone within a few inches of your mouth
Since dynamic microphones don’t really pick up anything unless they’re very close to your mouth anyway, this piece of advice is aimed more towards the people using condenser microphones.
Just because your microphone is sensitive enough to pick up your voice from the other end of the room, doesn’t mean you should keep it 3 feet away from your face. The optimal distance obviously depends on the microphone itself and the gain setting (we’ll talk more about gain later), but with most condenser mics, it’s recommended that you sit 6 to 10 inches away from them when recording.
Doing this will make your voice sound crisp and natural, whereas standing too far away will make you sound echoey and tinny. Similarly, speaking too close to the microphone is likely to result in distortion and clipping, making your recordings difficult to understand and unpleasant to listen to.
5. Make sure you’re using the right side of the microphone
This might sound silly at first, but you need to take into account that microphones fall into two categories: top-address microphones and side-address microphones. The former requires you to speak into the top of the microphone (like you would sing into a handheld mic during karaoke night), while the latter requires you to talk into the side of the microphone.
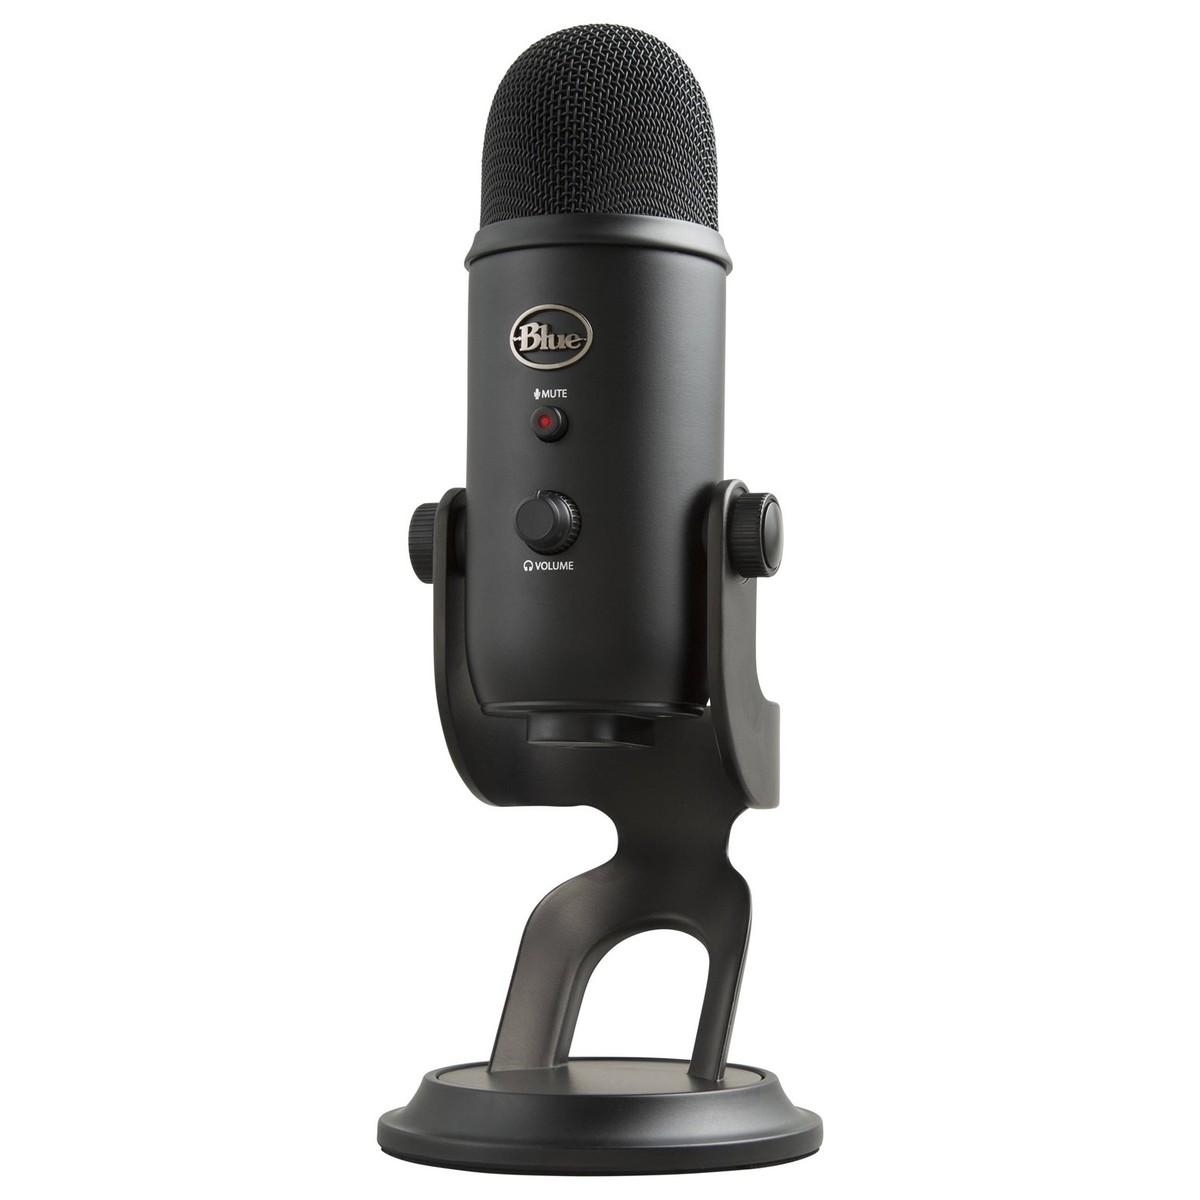
The famous Blue Yeti, (by far the most popular microphone among YouTubers and Twitch Streamers), is a side address mic, meaning your voice is only going to sound loud, crisp and clear if you talk into the front of it and not into its top.
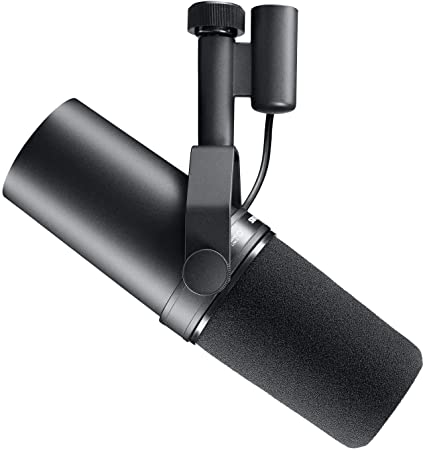
If you watch a lot of streamers and YouTubers, you’ve probably seen the Shure SM7B before. This is a front-address mic, which is why you’ll usually see it pointing directly at people’s mouths rather than just being positioned in front of their face.
How do I know if my microphone is side-address or front-address?
If you aren’t sure whether or not the microphone you have is side-address or front-address, you can check the instructions manual or google the make and model, since the information should be readily available.
If you don’t have any information about the microphone that might help you with your search, you can also experiment with talking into different sides of it and determine whether it’s side-address or front-address yourself.
6. Don’t move around while recording
After you’ve taken into account all the other advice here and found a good position for your microphone, it’s important that you don’t move around too much while recording. Don’t worry, this doesn’t mean you have to stand completely still, of course!
Gesturing and any other movements one might naturally do when talking are completely fine, as long as you don’t change your position too much relative to the microphone.
The reason for this is that moving farther away or to the right and left of the microphone might result in weird fluctuations in volume and sound quality which are unpleasant for your audience.
7. Make sure to set your gain to an appropriate level
There’s a lot of ways to define gain, but to put it in layman’s terms, the gain refers to how “sensitive” your microphone is, or how loud the final recording will be. If you set your gain too high, your recording will be “clipping”, meaning that your voice will be so loud that it will get distorted and ruined.
To prevent that, you want to dial back the gain a little, rather than keeping it at the default value of 100%. You can do this either by using the gain slider on the microphone itself (if there is one), or by accessing the Device Properties in Windows.
The ideal gain value differs from microphone to microphone, but dialing it back to at least 75% is always recommended. Remember, if your initial recording is loud enough that it clips, there is no way to fix it! A quiet recording can, however, easily be amplified during post-production without any loss in quality!
In fact, Flixier makes it incredibly easy to fix a low gain. When you add audio to video with Flixier, you can use the Gain Slider to adjust gain digitally and increase the volume of your recording to a more appropriate level so that your listeners won’t have to crank their volume up to max.
Remember though, this technique only works for increasing volume! Of course, you can also dial the gain level back to decrease the volume, but once your audio has been recorded, dialing back the gain in post-production isn’t going to remove clipping and fixing! The only reliable way to get rid of clipping after it already happened is to go back and record all over again, this time with the microphone gain set to an appropriate level. And nobody wants to do that, which is why it’s very important to be cautious and get it right the first time!
Closing Words
Congratulations in making it all the way to the end! We know this was a long piece, but we wanted to include all of the tips we knew to help you get the best possible voice recordings for your videos.
If you want to continue improving you audio quality by applying some post production, check out our article on how to make your voice sound recordings sound professional using Audacity, or watch the video we made about it below:


